
Table of Contents▼
In This Article
- What Channel Faders and Headphone Cues Actually Do
- How Headphone Cue Buttons Work on a Mixer
- Finding the Headphone Volume Knob on Your Mixer
- Why You Need to Hear Both Tracks in Your Headphones
- How to Use the Master Headphone Cue and the Mixing Knob
- Step-by-Step: How to Compose a Proper DJ Mix Using Faders and Cues
- Step One — Load the Track and Match the Tempo
- Step Two — Beat Match Through Your Headphones
- Step Three — Bring Down the Previous Track
- Summary: Headphone Cues and Channel Fader Workflow
What Channel Faders and Headphone Cues Actually Do
Channel faders and headphone cues let you prepare and blend tracks without the audience hearing anything until you're ready.
Up to this point we've been pressing play and matching the beats on both tracks with the volume turned all the way up. In a normal situation you wouldn't want the audience to hear the upcoming track from the moment you press play. You would first want to make sure that the tracks are perfectly synchronised and then turn up the volume.
In a normal situation you wouldn't want the audience to hear the upcoming track from the moment you press play. You would first want to make sure that the tracks are perfectly synchronised and then turn up the volume.
How Headphone Cue Buttons Work on a Mixer
Cue buttons let you hear the incoming track through your headphones even before the channel fader is turned up.
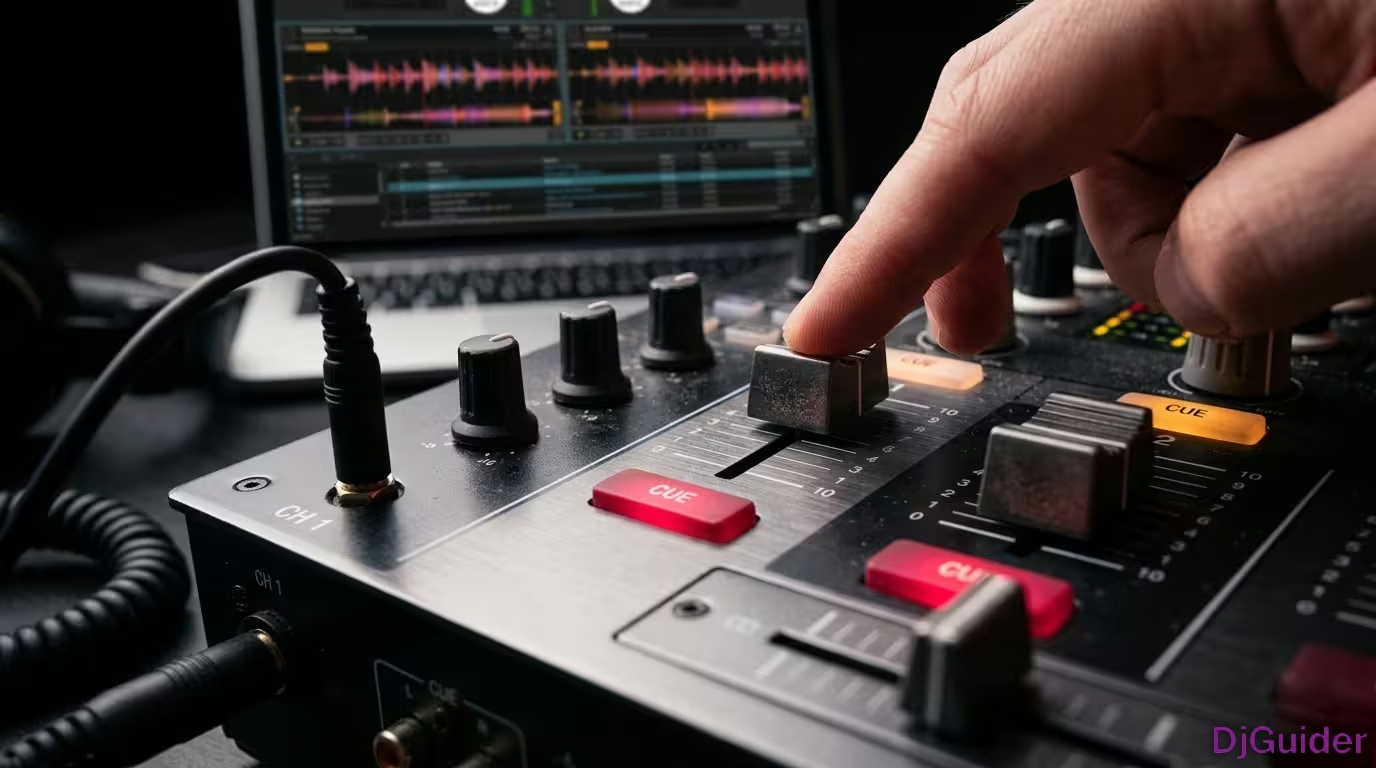
On pretty much all mixers you will find cue buttons usually located above the channel faders. Occasionally on some mixers such as the XDJ-RX they have a different location, but their function is still the same. What these do is allow you to hear the incoming track through your headphones even before the channel fader is turned up, meaning the track won't be audible through the main speakers.
Therefore the audience won't hear it, but you will. When you're preparing your upcoming track you want to activate the cue button on the corresponding channel in order to hear it through the headphones. When the light is on that means it is activated.
What this means is that the signal from that channel will be sent to your headphones even though the volume is turned down. These are the channel faders — you turn up the volume like this, you turn down the volume like this. This is how you turn music on or off to the audience.
Finding the Headphone Volume Knob on Your Mixer
You should also have a headphone volume knob located somewhere on your mixer, usually labelled "phones" or marked with a headphone icon.
Depending on your mixer it may be in a different location, but a quick scan through your mixer should tell you where it is. On the Pioneer DJM-900 Nexus 2 the headphone volume knob is located on the bottom left. On most Pioneer mixers, even the all-in-one systems, it's also in the same spot.
To reiterate — push the headphone cue that is connected to the incoming track and use the headphone knob to adjust the volume going to the headphones.
Depending on your mixer it may be in a different location, but a quick scan through your mixer should tell you where it is. On the Pioneer DJM-900 Nexus 2 the headphone volume knob is located on the bottom left. On most Pioneer mixers, even the all-in-one systems, it's also in the same spot.
Why You Need to Hear Both Tracks in Your Headphones
In most cases you'll also want to be hearing a little bit of your master track through your headphones as well as the incoming one.
This is because even though the track will be playing through the main club speakers, it will sound quite disconnected from what's coming through the headphones. Therefore it will be more difficult for you to synchronise or beat match the tracks if you can't hear at least a little bit of both. Most DJs would simply push the headphone cue on both channels, but this is not actually the correct way to do this.
Most DJs would simply push the headphone cue on both channels, but this is not actually the correct way to do this. If you use this method you can't actually control the volume of one track over the volume of the other through the headphones. This is because both headphone cues are pressed, so you'll be hearing both tracks through the headphones at an equal volume.
Most of the time you'll actually benefit from hearing your incoming track a little bit more than the master track.
The master track is already audible from the main club speakers. Having the incoming one slightly louder allows you to hear how it blends a little bit better.
How to Use the Master Headphone Cue and the Mixing Knob
Most mixers have a built-in master headphone cue and a mixing knob that lets you crossfade between the input channels and the master channel through your headphones.
If you look at where the headphone cues are, there is actually a headphone cue to the right of all of them placed on the master channel. This means that when you have this headphone cue turned on, anything that's being fed through the master channel — in other words anything that's going out to the club speakers — will also be sent to the headphones. Right above the headphone knob there is another knob titled Mixing, and this allows you to essentially crossfade between the normal input channels and the master cue channel.
If you want to hear a little bit more of the normal input channels you just twist the mixing knob slightly to the left. If you want to hear a little bit more of the master channel you twist it slightly to the right. This only affects what you hear through the headphones — it does not affect what goes out to the club whatsoever.
- All the way left — Isolates the incoming track
- Slightly left (10–11 o'clock) — Hear more incoming than master
- Centre — Equal balance of both
- Slightly right — Hear more master than incoming
The correct setup is:
- Have the headphone cue turned on for your incoming track only
- Always have the master headphone cue turned on
- Twist the mixing knob all the way left to isolate the incoming track
- Keep it in the middle to hear both equally
- Twist it slightly left to hear a bit more of the incoming track
- Twist it slightly right to hear a bit more of the master track
| Mixing Knob Position | What You Hear | Best Used When |
|---|---|---|
| All the way left | Incoming track only | Isolating the track for precise cueing |
| Slightly left (10–11 o'clock) | More incoming, less master | Beat matching — recommended setup |
| Centre | Both equally | Checking blend balance |
| Slightly right | More master, less incoming | Double-checking sync against the room |
Step-by-Step: How to Compose a Proper DJ Mix Using Faders and Cues
Here is how you apply everything above to actually put together a proper DJ mix from start to finish.
Start by playing track one. Have the headphone cue turned on for the deck linked to your incoming channel, and have the master headphone cue turned on as well. Have the mixing knob twisted slightly to the left — about 10 or 11 o'clock — so you can hear a bit more of the incoming track than the master track.
The level here you adjust to whatever you feel comfortable with — this is just the volume for the headphones. Press play on the incoming track and make sure the volume fader is down but the cue is turned on. Beat match using your headphones, and when the track sounds good, on the beginning of the next phrase you turn up the volume so everybody else can hear it too.
Leave them playing together for one phrase. When that phrase is over, turn down the previous track.
Step One — Load the Track and Match the Tempo
Load your new track and make sure the BPM matches and that it is cued on the first beat of the bar.
If it isn't on the first beat you would have to manually cue it. Then start counting the phrase on the master track and make sure your headphone cues are set up correctly. You want the incoming track's headphone cue on and the master track's headphone cue on.
Step Two — Beat Match Through Your Headphones
Start beat matching — the audience won't be able to hear the incoming track until you turn up the channel fader.
Count through the phrase and when you're satisfied the tracks are synchronised, wait for the start of the next phrase. At the top of the phrase, turn up the channel fader so the incoming track becomes audible to the audience. Leave both tracks playing together for the duration of that phrase.
Step Three — Bring Down the Previous Track
When the phrase ends, bring down the channel fader on the previous track and you're into your new track.
This process — cue, beat match, blend on the phrase, and drop the previous track — is the foundation of every DJ mix transition.
Summary: Headphone Cues and Channel Fader Workflow
| Step | Action | Key Detail |
|---|---|---|
| Press play on incoming track | Keep channel fader down | Cue button must be on |
| Set up headphone monitoring | Turn on incoming cue + master cue | Mixing knob at 10–11 o'clock |
| Beat match | Listen through headphones | Audience cannot hear incoming track |
| Turn up fader on phrase | Bring in the incoming track | Start of a new phrase only |
| Drop the previous track | Turn down previous channel fader | After one shared phrase |